Security Administration
Introduction
Security Administrators provide oversight of the HyTrust KeyControl cluster by creating users with specific privileges and managing these users and their membership in administrative groups. Security Administrators can add or remove privileges and assign users to admin groups, which are a collection of same-privilege admins who own system objects (sets of virtual machines, etc.). The Security Administrator can see overall system activity but can't see, touch or modify any system objects.
During installation of the first KeyControl node, a default Security Administrator (secroot) is created that has all privileges. Having this single administrator may be fine in some environments. For larger environments, you may want to have multiple administrators with different roles.
Managing User Accounts
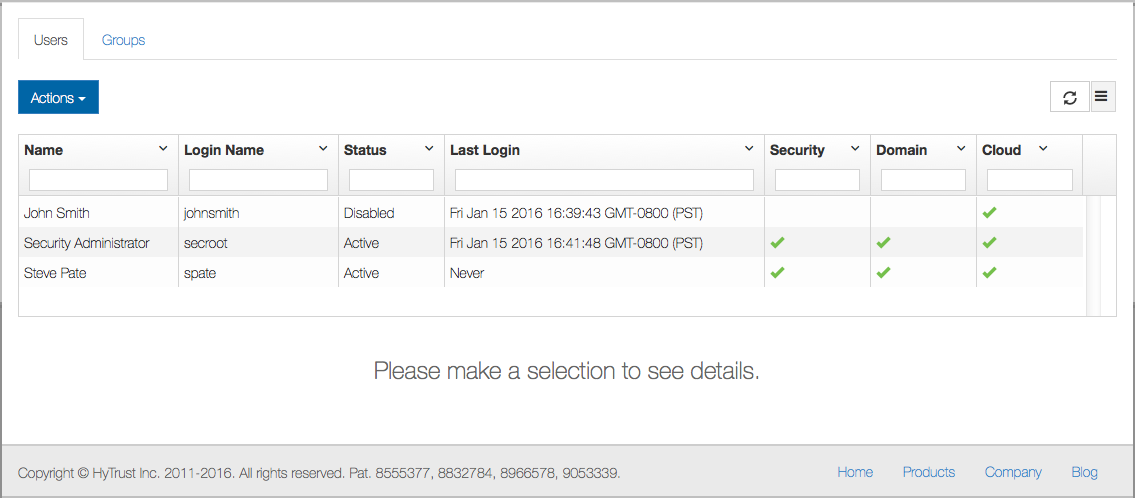
User management tasks can only be performed by Security Administrators. To view the list of current users, click the Security Icon.This will display overall information about each user in the system as shown below.
wwww
This list of shows the following fields by default, although you can change the order of the fields or display other fields by clicking the icon at the top right of the grid. The fields shown are as follows:
- Name - the full name of the user
- Login Name - the login ID for that user (cannot be changed)
- Status - the status of the account. The status is set to Active if the account is active and the user is able to log on. Otherwise, the status is set to Disabled. A Disabled status means that the account needs attention. This can occur if the user fails to enter the correct password. For further information, see the section Authentication Settings
- Last Login - the date that the user last logged on.(cannot be changed)
- Security / Domain / Cloud - checked to show Security Admin, Domain Admin, and Cloud Admin privileges.
To modify user accounts, see Editing User Settings, elsewhere in this topic.
Selecting a user displays detailed information about the user account.
If the user has failed to log on to the system by typing an incorrect password up to the maximum failed login attempts allowed, the account will be disabled. In the example shown above, johnsmith is shown as "Disabled." That threshold is settable in Authentication Settings It is accessed through the Settings Icon To activate the account, a Security Administrator must log on and explicitly activate the account.
Editing User Settings
To edit user information, type into the fields for user information that are shown. Note that you can also edit the fields showing in the two other tabs of information, for Authentication and for Privileges & Groups. The fields showing in all three tabs can be edited from this screen.
All fields shown can be modified. Click on a field that you want to change, and a detail view of the record appears in the lower half of the screen, where you can make changes. For example, an account can be explicitly disabled by clicking the Account status column for that use. This action opens the detail portion of the user record, where you can add or remove privileges. Make the change that you want and Save it.
You can change the form of authentication, user password, and password expiration date by clicking the Authentication tab and making the changes in the detail screen.
Likewise, you can change user privileges and assigned groups by clicking the Privileges & Groups tab, and making changes in the detail screen. When removing a privilege, any group memberships specific to that privilege will automatically be removed.
When adding either Domain or Cloud privileges a list of available groups will appear in the lower left pane for you to choose from. See the section Creating and Managing Groups, below, for further information.
Creating and Managing Groups
Each object in HyTrust KeyControl is owned by a group. Examples of where and how groups are used are:
- Alerts are posted to groups.
- Logging / auditing information is visible on a group-by-group basis.
- Each KeyControl node is managed by a member of the default KeyControl Admin Group.
- If VM Sets for different customers require separate administrators, create multiple Cloud Admin groups and separate the admins into these groups. Each administrator will only get access to VM information that belongs to his or her group. Most of these administrators will be Cloud Administrators.
The main places where group management is noticeable is with what a user can see and what audit records the user will be able to see. Security Admins see all audit records. Other admins see only the audit records generated within their respective groups.
When the system is installed there are two default groups created: the Cloud Admin Group and the KeyControl Admin Group.
The groups can be changed and additional groups can be created.
- The Cloud Admin Group has the Cloud Admin privilege, and can be used for all Cloud VM operations.
- The KeyControl Admin Group is used for all KeyControl cluster operations.
The names and descriptions of these default groups can be changed easily. Just select the group and edit the information in the detail screen, which appears below the primary screen.
The system is fully functional with just the two default groups, but we recommend that you plan how to split your users into additiional groups and assigning your admins to those groups before you start adding additional groups and users.
Creating New Groups
To create new Groups:
- Click the Security Icon at the top of the screen.
- Click the Groups tab, and then click Actions.
- Click Create Group. The Add New Group dialog box appears.
- Enter the Group Name, choose an administrative type for the group, and an optional Description, and then click Create. The group is immediately created, and you receive a confirmation, with the opportunity to create more groups.
If you are done, click Close, or click Create More Groups to go through the process again.
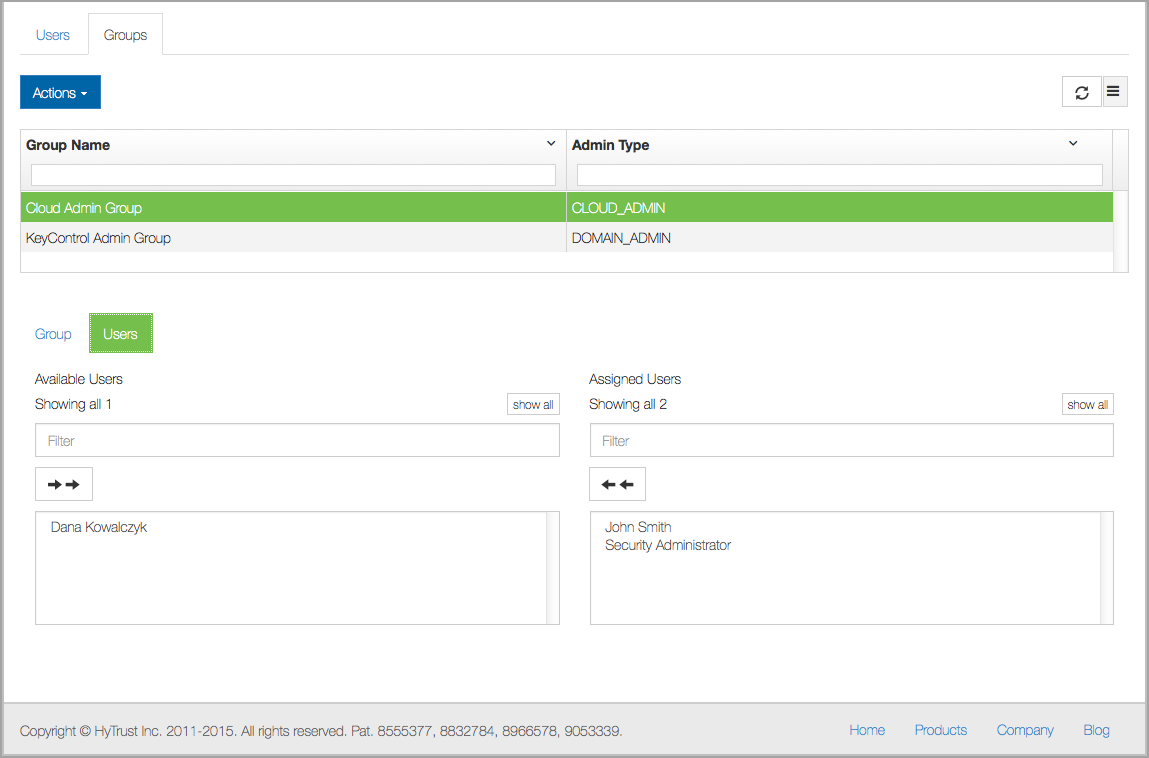
Based on the type of group selected, all administrators with the appropriate privilege will be displayed in the detail pane. In this case, we chose the Cloud Admin Group, and only two administrators had that privilege.
Modifying Groups
To change the description of a group, select a group by checking the name of the group. The edit screen appears, open to the Group tab, where you can change the name or description.
Click the Users tab to add and remove users with the appropriate privileges from a group. Note that the users who are potential members are on the left, and the actual membership of the group is shown on the right. Click the name of a user on the left to move that person into a group. Click the name of an administrator on the right to move that person out of a group. Click the double-arrow on either side to move everyone in or out of a group.
Note that only users with the appropriate privileges will be shown for a given group. To add privileges to a user, click the Users tab, select the user, and then click Privileges & Groups. Choose the privileges you want to add or remove from a user, and your changes take effect immediately.