This chapter covers the tools that HyTrust provides to be able to encrypt files, place them within AWS S3 buckets and access the files securely from VMs that reside within the same Cloud VM Set, whether those VMs are running in AWS or running outside of AWS.
Before continuing with this chapter you should become familiar with the KeyID interfaces described in File-Level Encryption Using KeyIDswhich form the basis of sending encrypted data securely between VMs in the same Cloud VM Set.
In simple terms, to access secure S3 buckets, you use the hcs3 command to create an S3 bucket, and then securely add files to the bucket. The files are encrypted before they are copied to S3. VMs within the same Cloud VM Set can then access those files and decrypt them without having to manipulate or manage encryption keys.
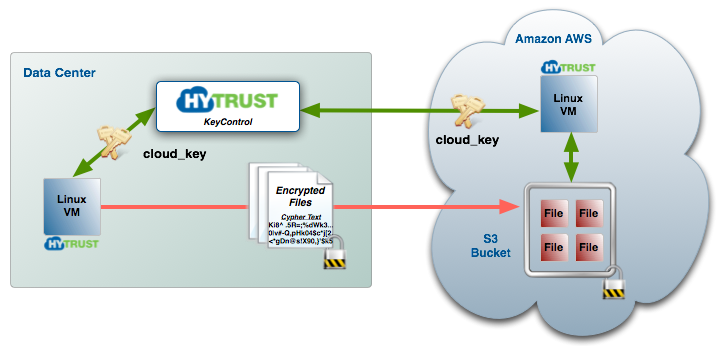
To kick things off, let's start with an example. Consider the following figure:
We want to create an S3 bucket, encrypt files and place them in the bucket and then access the files from the VM running in AWS. Here are the sequence of operations that are performed within the VM in the data center:
# hcs3 setstore TKIAN7ZDFBY2BU36DVPQ FZ9gsvIT1oDvuOiJrdSLRqBvmLZPcxzOWT4Qx7y5
# hcs3 create spate_aws
# hcs3 add spate_aws file1
# hcs3 add spate_aws file2
# hcs3 list spate_aws
file1 file2
First we call hcs3 setstore to provide our AWS access key id and secret. This is only called once. Next we create a bucket called spate_aws. Note that this will have the side effect of creating a KeyID which is also called spate_aws. Finally, we start adding files to the bucket. As the files are created, we first encrypt them before moving them to the bucket.
From within the VM in AWS, we can simply access the files as follows:
# hcs3 get spate_aws file1
# ls
file1
hcs3 InterfaceThe hcs3 command has a number of options, as follows:
Usage: hcs3 [params]
 cmd:
     status
     useraccess <-d | -e no_of_days>
     setstore aws_access_key_id aws_secret_access_key
     create bucketname
     delete bucketname
     list [bucketname]
     add [-k keyid] [-s] bucketname filename
     rm bucketname filename
     get [-s] bucketname filename [ofilename]
     set property=value
     version
     -h | -?
 property:     tmp     : [pathname, default: /tmp]
To use hcs3, the first thing you need to do is to create an Amazon AWS account and provide your AWS access key id and secret to the hcs3 command. This should be called once using hcs3 setstore command. For example:
# hcs3 setstore TKIAN7ZDFBY2BU36DVPQ FZ9gsvIT1oDvuOiJrdSLRqBvmLZPcxzOWT4Qx7y5
Where
TKIAN7ZDFBY2BU36DVPQ is the AWS Access KeyIdFZ9gsvIT1oDvuOiJrdSLRqBvmLZPcxzOWT4Qx7y5 is the AWS Secret KeyThis call should be made on all VMs that are going to require access to the bucket. Once again note that these VMs must reside within the same Cloud VM Set and this call only needs to be made once.
The rest of the options are fairly self explanatory and involve creating or deleting buckets, listing the contents of buckets, adding or extracting encrypted files from the bucket and removing files.
Alternatively, the user can also use environment variables to pass AWS credentials to hcs3 commands. The following variables are required:
AWS_ACCESS_KEY_ID — AWS access key.AWS_SECRET_ACCESS_KEY — AWS secret key.Access and secret key variables override credentials stored in credential and config files.
Before uploading encrypted files, the first thing to do is to create a bucket. Consider the following Cloud VMs:
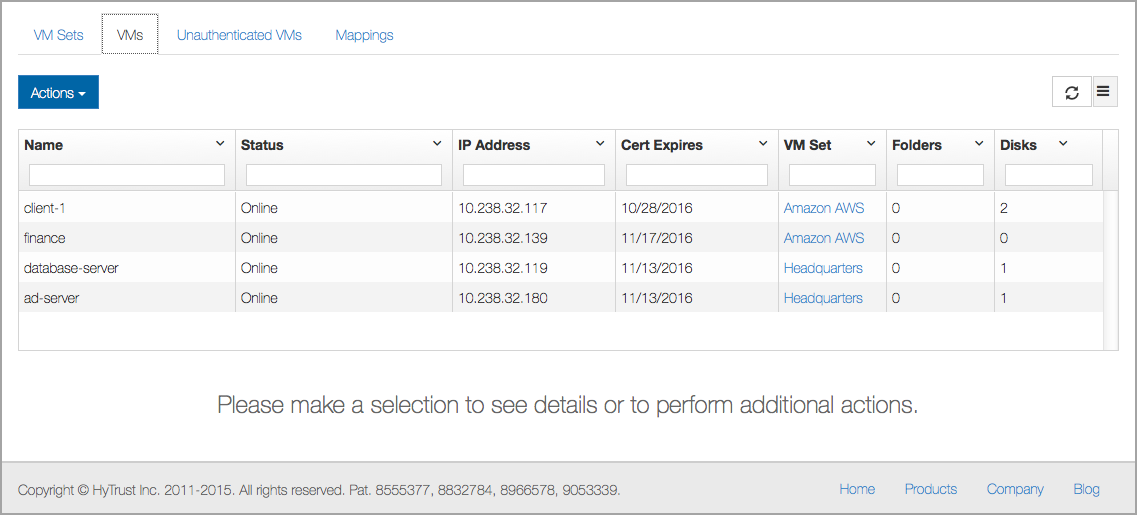
Let's assume that we want to move encrypted files between these four VMs (in any direction) via S3 buckets. The first thing we must do is to create a bucket. Bucket names have rules as defined by Amazon, which you can find here: Amazon S3 Bucket Restrictions
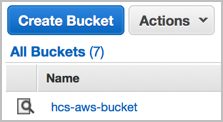
Now let's create a bucket called hcs-aws-bucket.
# hcs3 create hcs-aws-bucket
The hcs3 command creates a default KeyID that is used to encrypt files when they are uploaded to S3. The name of the default KeyID is derived by prepending the bucket name with the characters hcs3. This is done so that the admin can differentiate between general KeyIDs and KeyIDs that are created for S3 usage.

You can also view the bucket by looking through the AWS console:
The list of S3 buckets created can be obtained by running the following command:
# hcs3 list
Buckets
---------------------------------------------------
hcs-aws-bucket
The S3 bucket created by hcs3 can be deleted by using the following command:
# hcs3 delete <bucketname>
To remove a bucket, the bucket must first be empty. If not, you will see the following warning:
# hcs3 delete hcs-aws-bucket
Error deleting bucket: The bucket you tried to delete is not empty
If the bucket is empty and you request that the bucket be deleted, we delete both the bucket and the KeyID, so be warned: if you do use that KeyID to encrypt other files, you will no longer be able to decrypt those files. We highly recommend that you do not use S3 KeyIDs for any other purpose than with the S3 bucket for which they were created.
Once the bucket and its associated KeyID have been created, you can add, extract and delete files to and from the bucket from any VM within the Cloud VM Set that owns the bucket. Let's add some files:
# ls
file1  file2  file3
# hcs3 add hcs-aws-bucket file1
# hcs3 add hcs-aws-bucket file2
# hcs3 add hcs-aws-bucket file3
# tar cvfz files.tgz *
file1
file2
file3
# hcs3 add hcs-aws-bucket files.tgz
And from either the same VM or another VM we can view which files are in the bucket:
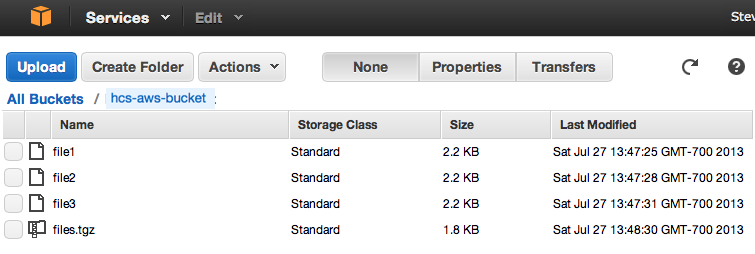
# hcs3 list hcs-aws-bucket
file1
file2
file3
files.tgz
The files are also visible from within the AWS console:
To pull out a file and decrypt it:
# hcs3 get hcs-aws-bucket file2
and to remove a file:
# hcs3 rm hcs-aws-bucket file3
# hcs3 list hcs-aws-bucket
file1
file2
files.tgz
The files added with hcs3 add are encrypted with the default KeyID for that bucket. However, the user can choose to encrypt the files with a custom KeyID. The custom KeyID can be created with a user-selected cipher using hcl keyid -c. See the man page for the hcl command for details.
The user can specify the custom KeyID with an entry like this:
# hcs3 add -k my-own-key-for-s3 hcs-aws-bucket file4
You can get status information about your Amazon ID and the list of buckets available to you as follows:
# hcs3 status
Summary
---------------------------------------------------
Registered Stores
---------------------------------------------------
Store Name          ID                      Owner
---------------------------------------------------
Amazon              AKIAJ7ZDFBY2BUT6DVPQ    spate

Buckets
---------------------------------------------------
hcs-aws-bucket
tmp_space
Properties
---------------------------------------------------
tmp directory = NOT SET
If you want to see which files are in a particular bucket:
# hcs3 list hcs-aws-bucket
file1
file2
files.tgz
hcs3 Access to Non-Root UsersThe command is:
# hcs3 useraccess <-d | -e no_of_days>
The command enables hcs3 access for non-root (non-Administrator) users. Access can be enabled for a specific number of days (-e). If zero days are specified, then the access is enabled forever until specifically revoked using the -d option.
The root user can disable non-root access using the -d option.
If non-root user access is enabled, regular users can use hcs3 to store encrypted files in S3. They can create / remove buckets just as the root user can.
It is recommended that the user provide his/her AWS credentials using environment variables, as discussed earlier. However, a non-root user can also store his/her credentials using hcs3 setstore. The credentials are stored in an encrypted file in the $HOME/.hytrust directory.
Non-root users can also set their temporary scratch space using the hcs3 set command.
hcs3 propertiesThere is only one property supported at present: tmp. "tmp" can be set to the full path of any directory to which the user has access. This directory is used to hold the files temporarily as they are encrypted or decrypted, in transit.
The syntax of the command is:
# hcs3 set tmp=<path to scratch space>
On Linux, the default value of the "tmp" property is set to "/tmp". However, on Windows temporary files are kept in the same directory as the source file. Therefore it is very important on Windows to set the "tmp" property to an appropriate value. This is especially important for users who do not have administrator privileges.
hcs3 FailuresThe only failure we are aware of manifests with an error message from Amazon, saying "Please reduce your request rate," sometimes referred to as the "SlowDown" error. We have modified our code to minimize the occurrence of this issue. For further information and additional workarounds, see this Amazon Forum thread: https://forums.aws.amazon.com/thread.jspa?threadID=218001.