This chapter describes how to use KeyIDs to encrypt objects that can be moved between VMs within a single Cloud VM Set.
An encryption object is simply a file that is encrypted using an encryption key stored within the KeyControl cluster. We refer to these keys by their KeyID names, a symbolic name that references the actual encryption key. The KeyID is available to all VMs within a single Cloud VM Set. Even other VMs that you own in different Cloud VM Sets are unable to access any data encrypted with a KeyID from another Cloud VM Set.
Note that to encrypt objects, you will need to have the Policy Agent software installed. This feature is independent of encrypting devices.
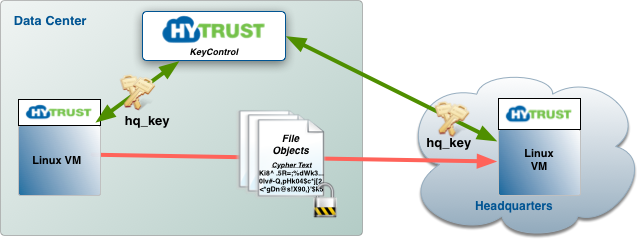
To explain how this all works, let's start with an example. Consider the following figure where we wish to securely move data between a Linux VM in the data center and a Linux VM in Headquarters.
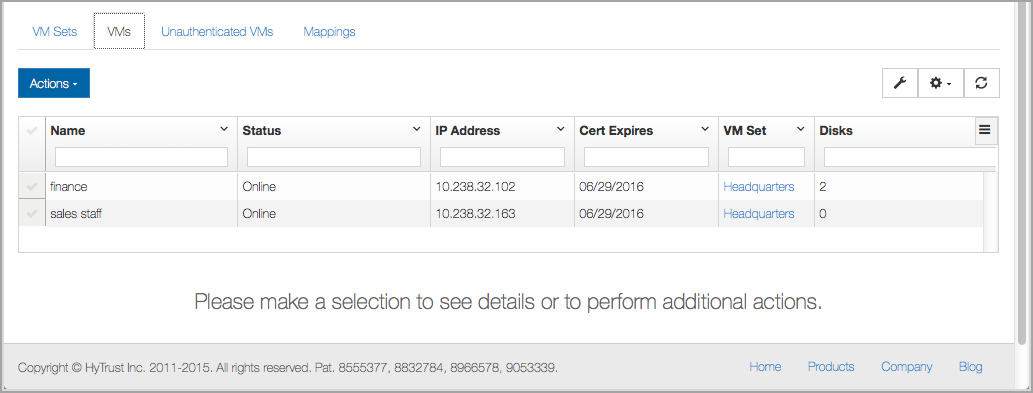
Here we have the two VMs in a Cloud VM Set called Headquarters:
The first step is to generate a key that can be accessed from within both VMs. Let's create a KeyID called hq_key:
# hcl keyid -c hq_key -d "Secure exchange of HQ data"
The KeyID can be generated from any VM in the Cloud VM Set. The KeyID Name is visible within the webGUI. For example:

Next, from the VM in the data center, we will zip up some files that we wish to encrypt and then call hcl to encrypt them:
# ls
file1  file2  file3  file4  file5
#> zip files.zip *
  adding: file1 (deflated 55%)
  adding: file2 (deflated 55%)
  adding: file3 (deflated 55%)
  adding: file4 (deflated 55%)
  adding: file5 (deflated 55%)
# hcl encryptfile -k hq_key files.zip files.zip.enc
The files.zip.enc file is now encrypted and can be safely copied to the other VM in Headquarters. Let's just make sure that the encrypted file is different from the original zip file:
# od -x files.zip | head -4
0000000 4b50 0403 0014 0000 0008 82ce 42d9 44cb
0000020 cabd 01ad 0000 03bf 0000 0005 001c 6966
0000040 656c 5531 0954 0300 2633 51ca 5a5f 51d4
0000060 7875 000b 0401 0000  0004 0000 5500
# od -x files.zip.enc | head -4
0000000 3255 7346 4764 6b56 3158 412f 6433 5739
0000020 4470 3557 336a 2b51 4355 344d 3245 6773
0000040 684b 746d 766f 4d79 4856 4843 7a6a 4970
0000060 6159 5350 3734 5069 7145 4959 7758 4231
From within the Headquarters VM, we can now decrypt the encrypted zip file and get access to our unencrypted files as follows:
# hcl decryptfile files.zip.enc files.zip
# unzip files.zip
Archive:  files.zip
  inflating: file1
  inflating: file2
  inflating: file3
  inflating: file4
  inflating: file5
We do not distinguish between where the KeyIDs are generated or which VM is encrypting/decrypting, so you can move encrypted objects between any VM in the same Cloud VM Set, wherever they happen to reside. Remember that they can only be shared within the same Cloud VM Set.
There are three hcl subcommands available to create and manage KeyIDs and to encrypt/decrypt files:
# hcl keyid <-c keyid_to_create [-a <cipher>] [-d description]

         [-e days_to_expire [-o "NO USE"|"SHRED"]]>

         <-r keyid_to_remove [-f]>

         <-u keyid_to_update [-d description]>

         <-l>

# encryptfile [-f] [-k keyid] filename [encryptedfile]

# decryptfile encryptedfile [filename]
The options that can be passed to keyid are:
-c is the name of the KeyID. This symbolic name will be used when encrypting or decrypting files.-a is the encryption algorithm to use. The algorithms for file encryption are:
AES-128 and AES-256 on Windows and Linux
AES-XTS-256 and AES-XTS-512 on Linux if supported by the installed openssl on the VM
-e is the number of days for which the key is valid. On expiration the action apecified in the -o parameter will be taken. If you do not specify this option, keys will not expire. You will receive Alerts when a key
approaches expiration.-o is what happens when the key expires. By default NO USE is used. The key is not served to a VM but
can be reactivated in the webGUI. Another option is SHRED, where the key is destroyed on expiration.-l requests a list of all current KeyIDs associated with this Cloud VM Set.-r is the name of the KeyID that you wish to delete.-u Updates the description for a KeyID with the string specified in -d.-d is an optional description for the key. It is generally a good idea to add a description.Let's try a few examples. First off, let's create a KeyID:
# hcl keyid -c my_new_key
And now let's list the current set of keys:
# hcl keyid -l
Keyid        Algorithm    Description
-----        ---------    -----------
hq_key       AES-XTS-512  Secure exchange of HQ data
my_new_key   AES-XTS-512
Let's add a description to the KeyID:
# hcl keyid -u my_new_key -d "This is my new key"
# hcl keyid -l
Keyid        Algorithm    Description
-----        ---------    -----------
hq_key       AES-XTS-512  Secure exchange of HQ data
my_new_key   AES-XTS-512  This is my new key
Now let's take a look in the GUI at the KeyIDs:
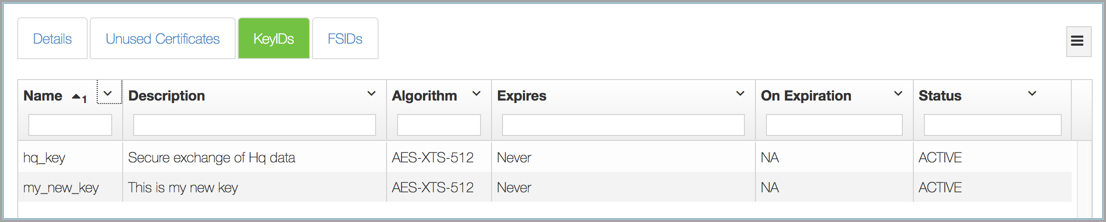
Once again, note that these KeyIDs can only be used by the two VMs in our Headquarters Cloud VM Set as well as any VMs we subsequently create in the Headquarters Cloud VM Set.
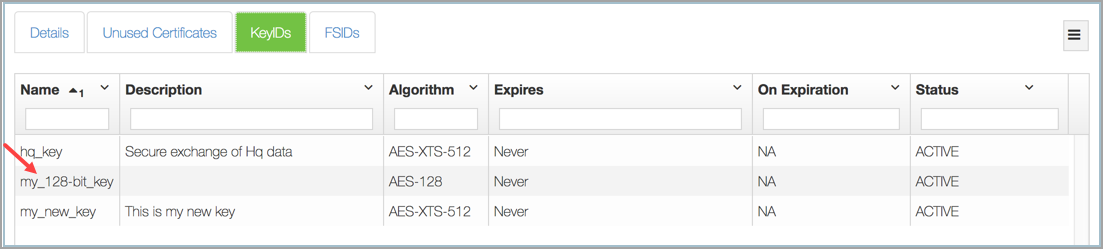
Both KeyIDs listed use AES-XTS-512. If you wish to use AES-128, you can create a KeyID as follows:
# hcl keyid -c my_128-bit_key -a AES-128
And here it is in the webGUI:
For each KeyID, you can modify several properties either through the webGUI or through the command line. Within the webGUI, the description, the expiration data, and what to do on expiration can be changed. To change these parameters, select the KeyID you want to change, and then make the changes in the dialog box that appears. In this dialog box, we chose 12/31/2016 as the expiration date, and specified SHRED as the action to take on expiration:
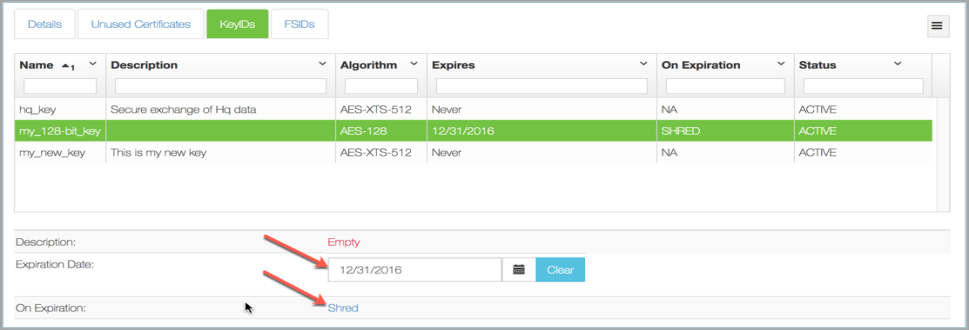
You will be able to select the expiration date from the pop-up calendar, and then specify what happens at expiration. Either the key will be shredded or will be switched to NO USE in which case the key will be escrowed but will be unusable. You can also change the description of the KeyID.
Note that if you choose to, you will be able to grant access back to the key in future, but only if you set it to NO USE at expiration. If you set it to SHRED at expiration, it is gone completely.
If you wish to modify the description of the KeyID from the command line, invoke hcl as follows:
# hcl keyid -u hq_key -d "This is my new description"
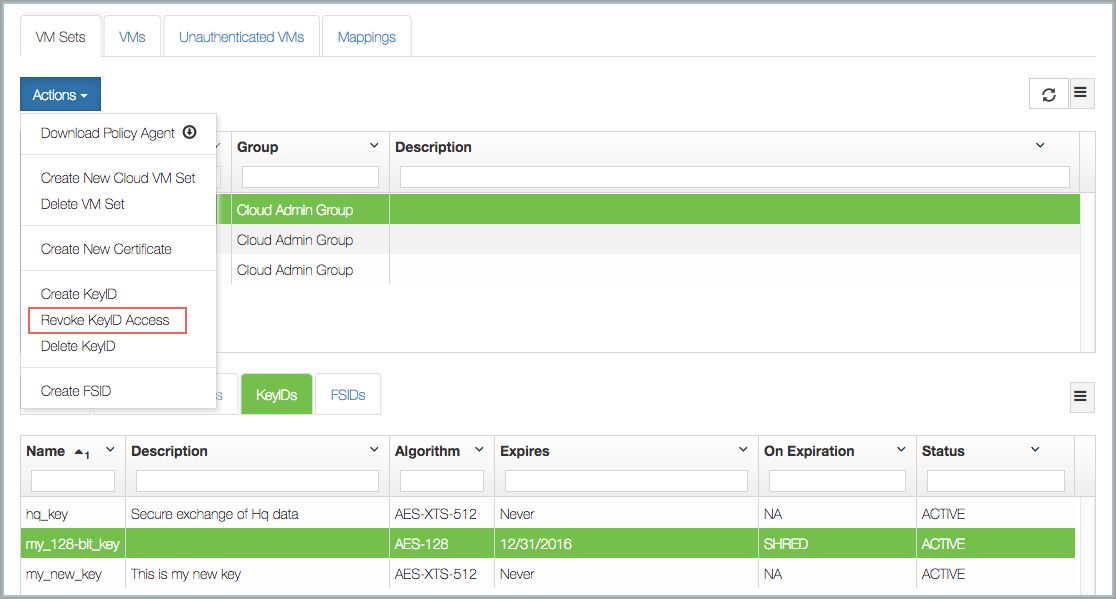
You can revoke access to a KeyID, which will prevent usage of the KeyID. To revoke access, select the KeyID, click the Actions button, and then click Revoke Keyid Access. You will be prompted to confirm the revocation by a dialog box, where you click Proceed or Cancel. Click Proceed.
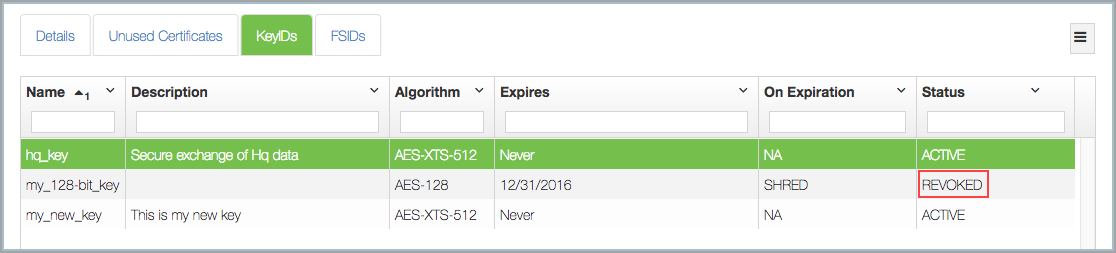
In the webGUI, the KeyID shows as REVOKED:
Now if you attempt to use the KeyID, you will see the following:
# hcl encryptfile -k my_128_bit_key files.zip files.zip.enc

Error on keyid getkey my_128-bit_key: Keyid not ACTIVE
You can reactivate the KeyID. To activate a revoked KeyID, select the KeyID, click the Actions button, and then click Activate Keyid Access. No confirmation is needed.

KeyIDs can be removed as follows:
# hcl keyid -r hq_key
WARNING: Removal of keyid will result in permanent failure to decrypt anything using that keyid.
Do you want to proceed? (y/n)
| Note: | If you confirm and remove the key, it will no longer be accessible, so any data that was encrypted using the key will no longer be available. |