Open topic with navigation
Deploying an Elastic Load Balancer (ELB)
An Elastic Load Balancer (ELB) enables you to share the impact of virtual machines on multiple KeyControl nodes in a KeyControl Cluster. It does this without your intervention after the initial setup phase. This material walks you through setting up your ELB.
Requirements for Deploying an ELB
The following components are required prior to placing an Elastic Load Balancer
(ELB) in front of a new KeyControl cluster:
- Two or more running KeyControl instances.
- A Security Group of KeyControl nodes.
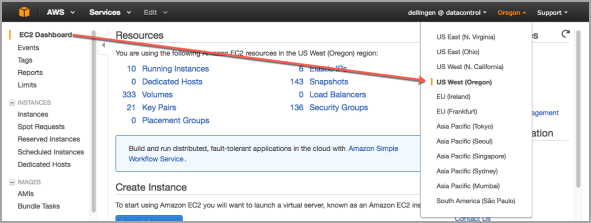
Log on and Select your Region
Take the following steps:
- Log on to your EC2 account.
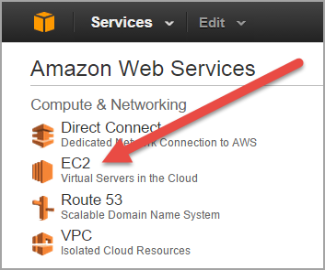
- Navigate to EC2 Console Dashboard.
- At the top right of EC2 Dashboard, select the region in which your existing
KeyControl node/cluster resides.
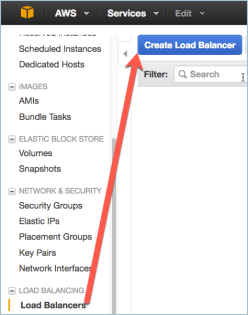
Create your Load Balancer
- From EC2 Dashboard under LOAD BALANCING, select Load Balancers from the
navigation panel.
- Click Create Load Balancer.
Select Load Balancer Type
- Next you choose a load balancer type. For HTTP and HTTPS, Amazon recommends Application Load Balancer over Classic Load Balancer. These instructions assume that you have chosen the Application Load Balancer.
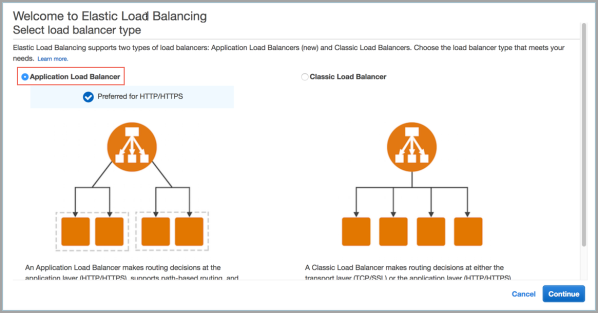
- Click Continue. AWS now shows you the steps to create a Load Balancer. You are beginning with Step 1: Configure Load Balancer:

Step 1: Configure Load Balancer
- In the first step specify a name for the load balancer. Note that the name must be only alphanumeric. Hyphens are OK; spaces are not.
Under Scheme, choose Internet-facing.
- Under Listeners, make the following selections:
- Select HTTPS (Secure HTTP) for Load Balancer Protocol.
Accept 443 as the load balancer port.
- Click Add listener, and then select HTTPS (Secure HTTP) for Load Balancer Protocol.
Accept 443 as the load balancer port
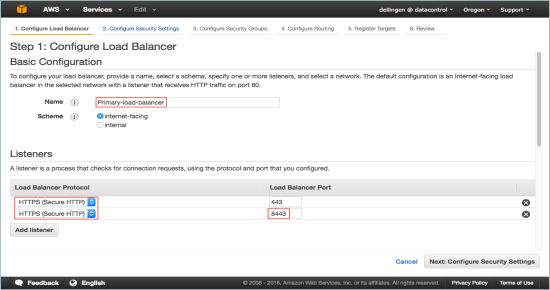
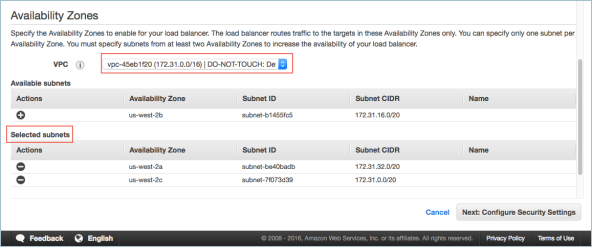
- Scroll down to Availability Zones, select your VPC from the scrolling list and select at least two subnets.
- Click Configure Security Settings.
Step 2. Configure Security Settings
- In the Select Certificate section, select a location for Certificate type, and then select a Certificate by Certificate name.
- In the Select Security Policy section, accept the default, ELBSecurityPolicy-2015-05.
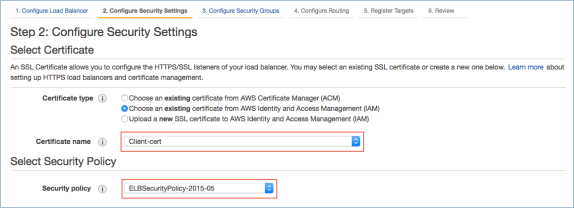
- Click Configure Security Groups.
Step 3: Configure Security Groups
- Select a Security Group for your load balancer, or choose to create a new one. These instructions show using an existing Security Group. To create a new one, see Create a Security Group
.

- Click Next: Configure Routing
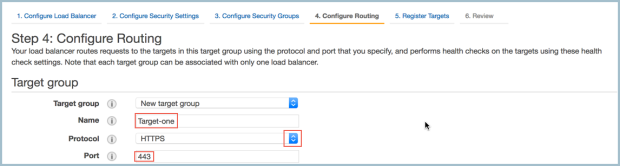
Step 4: Configure Routing
- Here you define the protocols and ports used for your load balancer. On the top half of the screen, under Target group, give your target a name, pick a protocol and a port. We chose the HTTPS protocol, port 443. Note that with the name, you can use only alphanumeric characters and hyphens, no spaces:
- Moving to the lower half of the screen, to Health checks. Select HTTPS for protocol, and set the path to be
/doc/Admin_Guide/Admin_Guide.html.
- You can configure Advanced health check settings later, if need be.
- Click Next: Register Targets.
Step 5: Register Targets
- Register targets with your target group. Available instances are shown. As you select each instance, the load balancer begins routing requests to the instance as soon as the registration process completes and the instance passes the initial health checks.
- When you have finished, click Next: Review.
Step 6: Review
- This summary page enables you to review and edit your load balancer details before continuing.
- When you have finished editing, as needed, click Create. Your load balancer is created.
- You will be shown a summary of the settings for your load balancer, and then returned to the Create Load Balancer page.
Verifying the Load Balancer
To make sure the load balancer is working:
- Click the Description tab for the load balancer.
- Copy the DNS name of the ELB, excluding (A Record).
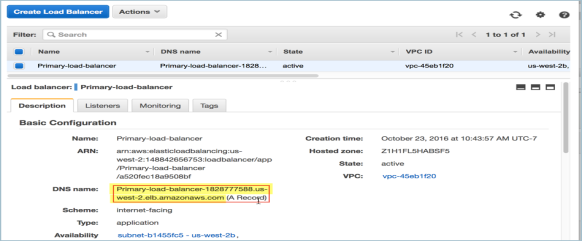
- Open your browser, and in the address bar type https://load-balancer-DNS-name.

After a pause, you should see the login page of one of your KeyControl
instances.
- Log on with your Username and Password. If your login is successful, you have set up your Load Balancer successfully.
Open topic with navigation