KeyControl Installation on a vCloud Air Portal
This chapter shows how to deploy a KeyControl node on a vCloud Air Portal. For deployment in a vCloud Air environment, HyTrust provides a single virtual node in OVA format. With a few simple clicks and minimum configuration you will have a KeyControl node up and running within minutes. The same OVA is used for any KeyControl deployment, whether this is your first KeyControl node or you are adding a node to an existing KeyControl cluster. The material that follows shows the various steps involved in setting up HyTrust KeyControl on vCloud Air:
Log on to vCloud Air, Using Your Existing Credentials
Log on to vCloud Air.

You see the default dashboard screen. Click on My Subscriptions.

Choose a Virtual Data Center to Host Your HyTrust Key Controller
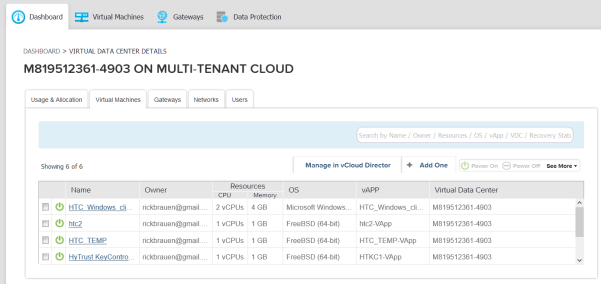
The Dashboard tab appears. Click on the image for the Virtual Data Center you plan to use.

That Data Center opens up, with multiple tabs showing.

Click the Virtual Machines tab, then pick the HyTrust KeyControl virtual machine. (right now it is in a private area, but later it will be in the VMware Catalog tab)
Click + Add One. The Select Template dialog box appears.
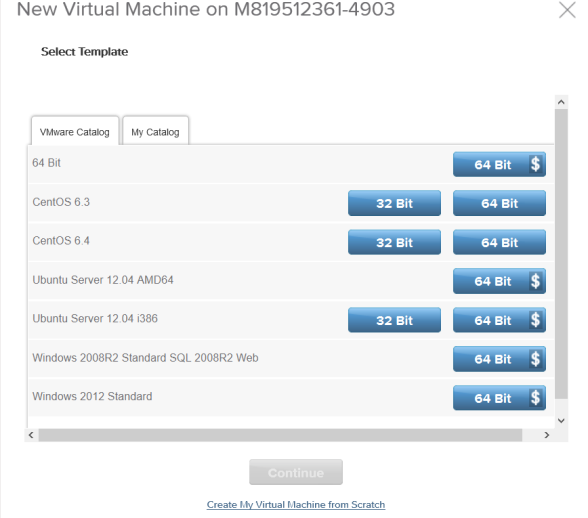
In the VMware catalog tab, select the HyTrust KeyControl template and click Continue. This action takes you to the Add Key Details dialog box, which asks you for the Name and Hostname of your new virtual machine and lists the specs for the OVA that is about to be deployed..
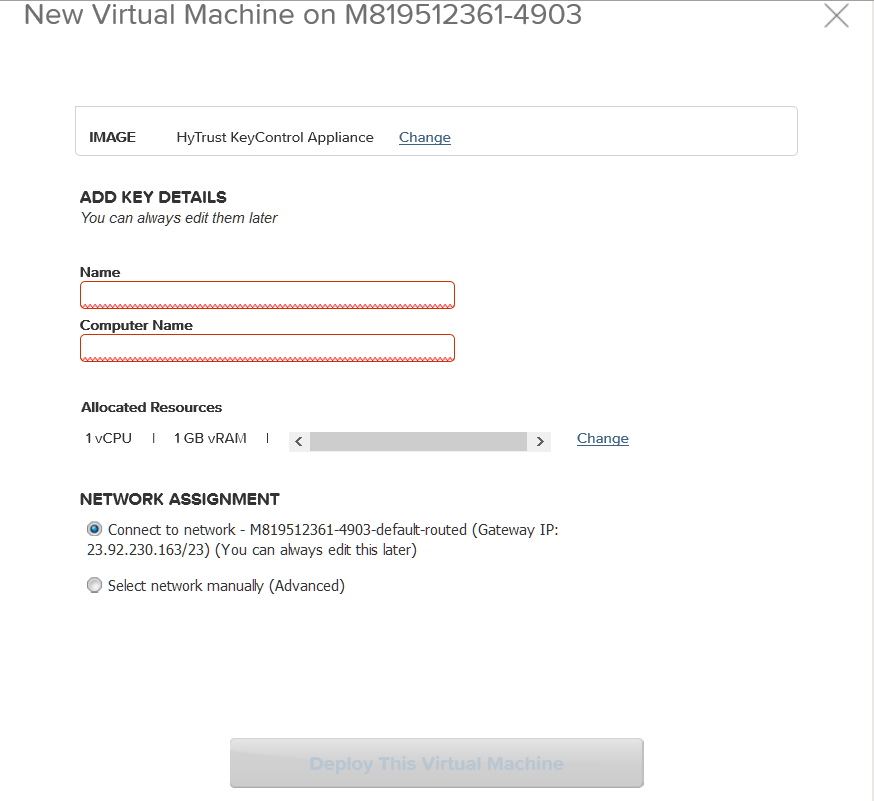
The default OVA is set for 1vCPU, 1GB of RAM, and a certain size of disk, but all of these can be reset. Note that HyTrust recommends a minimum of 2vCPUs and 4GB of RAM. The image below shows the default values. Enter a Name and Computer Name for this virtual machine.

When done, click Deploy This Virtual Machine. Your new VM appears on the Virtual Machines tab as it is created, with the name that you gave it.
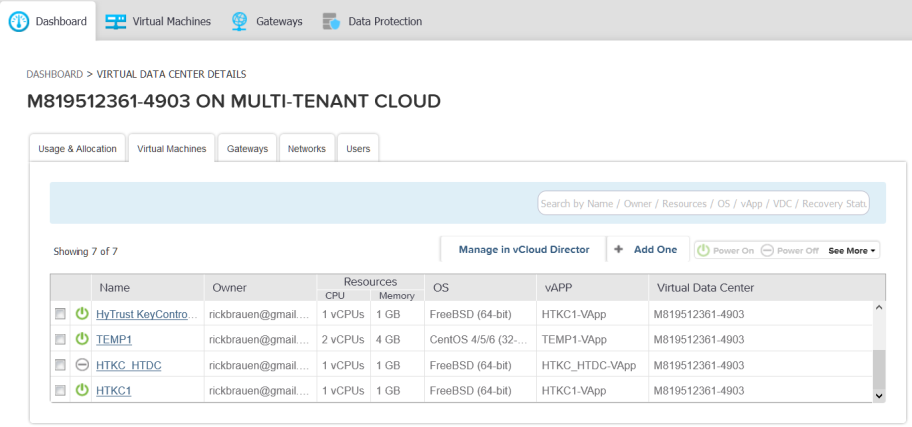
The creation process takes a few minutes, but vCloud Air gives you a status indicator.
On the Settings dashboard for the new machine, you can change the various parameters of the new VM. Click on the name of the new VM to see details, which opens up the Virtual Machine Properties dialog box for that page.
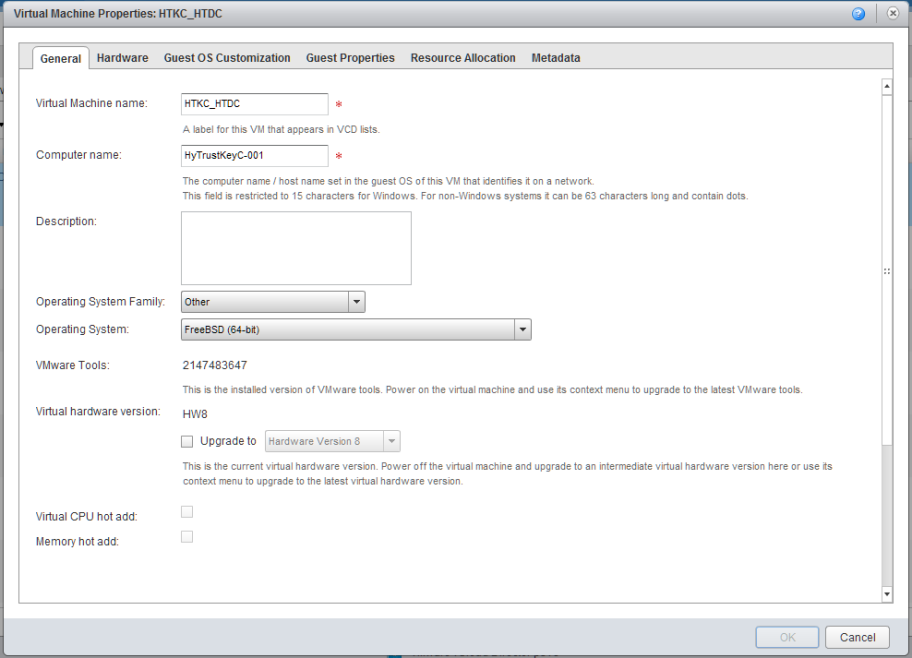
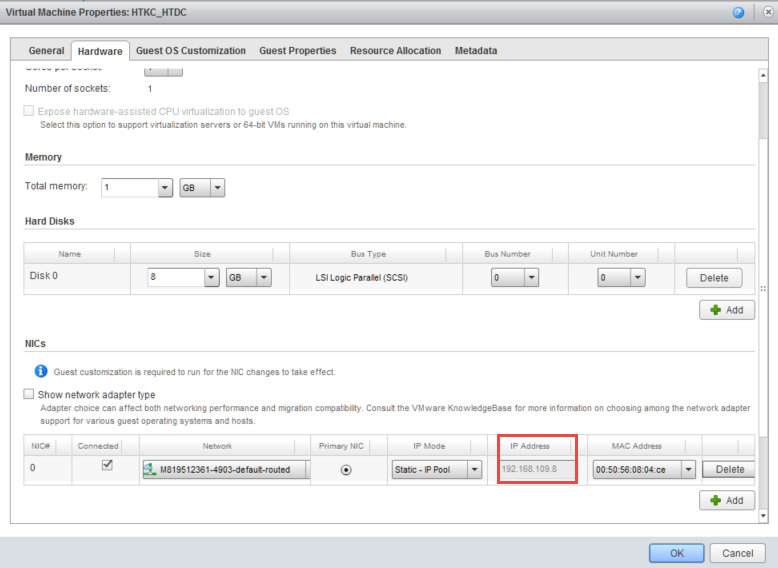
You initially see the VM in a graphical representation.Click on the Virtual Machine tab. On the Virtual Machine properties screen, go to the Hardware tab and copy the IP address value, which you will need later.
Next, click the Guest OS Customization tab, then click to Enable guest customization, click OK, and ignore the rest of the page.

You will see a warning that you can ignore. Close it by clicking “x” in the corner of the warning.

Click the Guest Properties tab, and begin entering the customizations for your KeyControl system. The Primary DNS Server is the same as your KeyControl system, except that it ends with “.1” Get the domain name from the URL, and paste it in. For Gateway, use the same IP as the primary DNS server. The KeyControl system hostname is the one that you typed in as Name earlier. The KeyControl system IP address is the one that copied earlier. Specify the netmask. When your entries are complete, click OK. Below is the image of a completed network properties page. Click OK.

The same warning dialog box appears. Close it. Go back to the OS Customizations tab, and uncheck the Enable guest customization selection, and click OK.
The OVA is created with FreeBSD, which doesn’t fully support guest customization.The workaround is to ignore the warning for now, and check “allow customization” to put in the various parameters. The important things have already been added, and further customization is not needed. Note that the default is 1vCPU, and HTDC works better with 2-4 CPUs, and several GB of RAM.
Launch the HyTrust Initialization Application
Double-click on the console image of the HyTrust application, or right-click and select Pop Out Console.
At this point you should switch to the KeyControl system menus in the console. There are a couple of tasks to perform on the system menus to complete the KeyControl configuration.
KeyControl System Menu Tasks
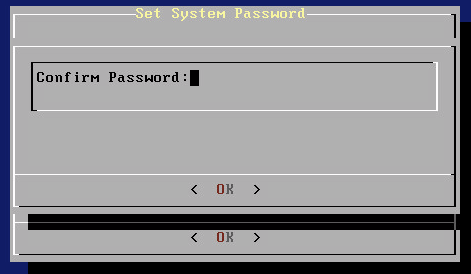
First you will be prompted to change the console menu system's password:

You will be required to enter the password twice. Passwords must be a minimum of eight characters. The console menu to which the root/password combination enables access is where diagnostics and settings can be manipulated for this system during its lifetime. Without the password, access to the system for these tasks is impossible. It is critical that the password be stored safely somewhere.
The last step in configuration is choosing whether you are going to add this new KeyControl system as a new node to an existing cluster:

If you choose to add this new KeyControl system as a new node in an existing cluster, follow the directions here Installing Additional KeyControl Nodes.
If this is your first KeyControl system and you respond No to this prompt, your system is fully configured and you will see the last of these post-install menus pointing you to the webGUI interface:

After this, you are brought to the main menu for the console menus. At this point you can choose to log out. Remember that further access to the system menus requires the password that you just set up.