Security Administration
Contents
- Introduction
- Creating and Managing User Accounts
- Displaying User Information
- Editing User Settings
- Group Management
- Changing Default Settings
- Authentication
- Setting up RADIUS Support
- Default Password Settings
- Default Email Settings
- Default Admin Key Settings
- License Management
Introduction
Security Administrators provide oversight of the HyTrust KeyControl cluster by creating users with specific privileges and managing these users and their membership in administrative groups. Security Administrators can add or remove privileges and assign users to admin groups, which are a collection of same-privilege admins who own system objects (storage, sets of virtual machines etc). The security administrator can see overall system activity but can't see, touch or modify any system objects.
During installation of the first KeyControl Server, a default security administrator (secroot) is created that has all privileges. Having this single administrator may be fine in some environments, for example a small IT shop. For larger environments, you may want to have multiple administrators with different roles and only have the security administrators providing oversight, managing the Admin Key and so on.
Creating and Managing User Accounts
User management tasks can only be performed by Security Administrators. To view the list of current users, select the SECURITY tab or select Users from the tree view while performing any Security Administration tasks. This will display overall information about each user in the system as shown below.
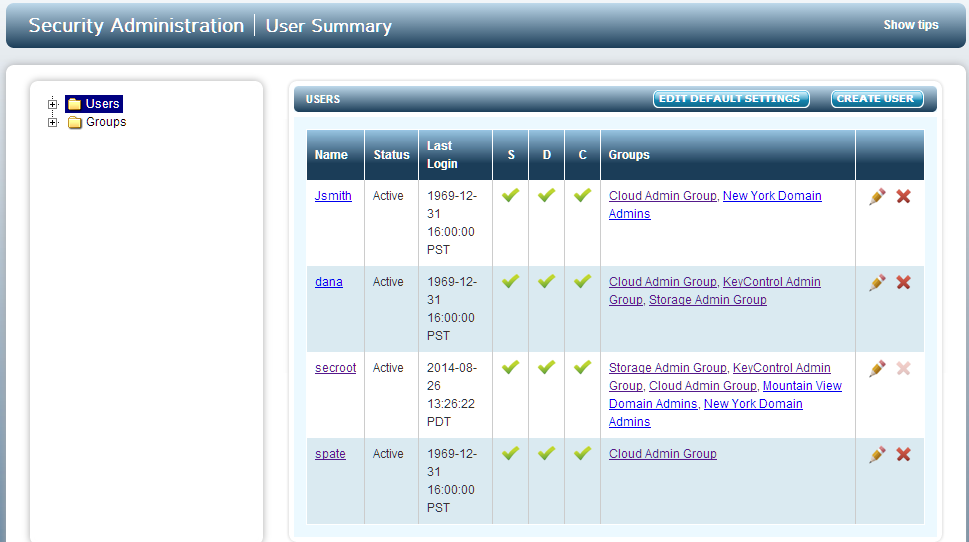
The list of users is shown in both the tree view and in the main window. The fields are as follows:
- Name - the logon name
- Status - the status of the account which will be Active if the account is active and the user is able to log on. If the status field is Disabled the user will not be able to log on and the account needs attention. This can occur if the user fails to enter the correct password. (see the section Default Password Settings for further information).
- Last Login - the date that the user last logged on.
- S / D / C - checked to show Security, Domain, and Cloud Admin privileges.
- Groups - the admin groups to which the user belongs.
On the far right, administrator settings can be modified or the user can be deleted.
| Edit user settings | |
| Delete User |
See the section Editing User Settings for details about how to edit user accounts.
Displaying User Information
Selecting a user, either from the tree view or from the main panel, displays detailed information about the user account. An example is shown below:
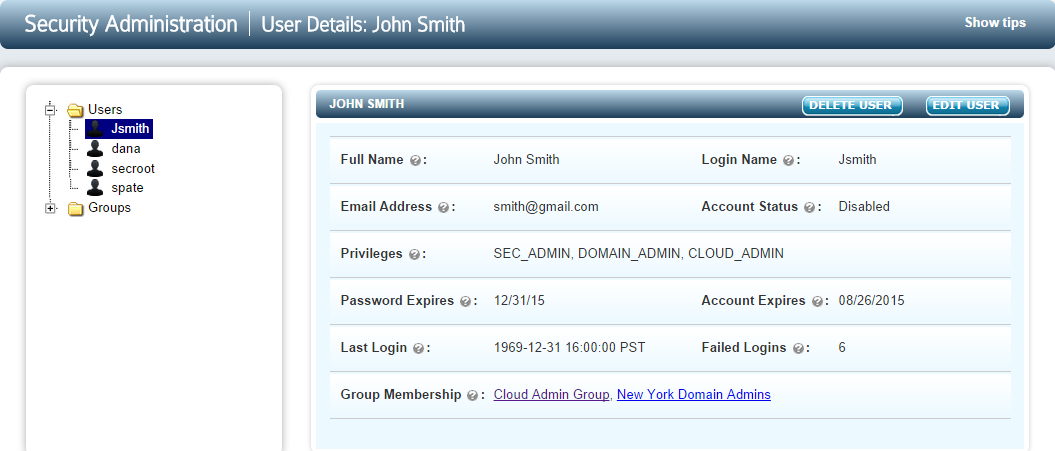
If the user has failed to log on to the system by typing an incorrect password up to the maximum failed logon attempts allowed, the account will be disabled. In the example shown above, there have been 6 failed password attempts, one more than the threshhold of 5. To activate the account, a Security Administrator must log on and explicitly activate the account.
Editing User Settings
When choosing to edit user information, a new screen will be presented allowing user information to be changed:
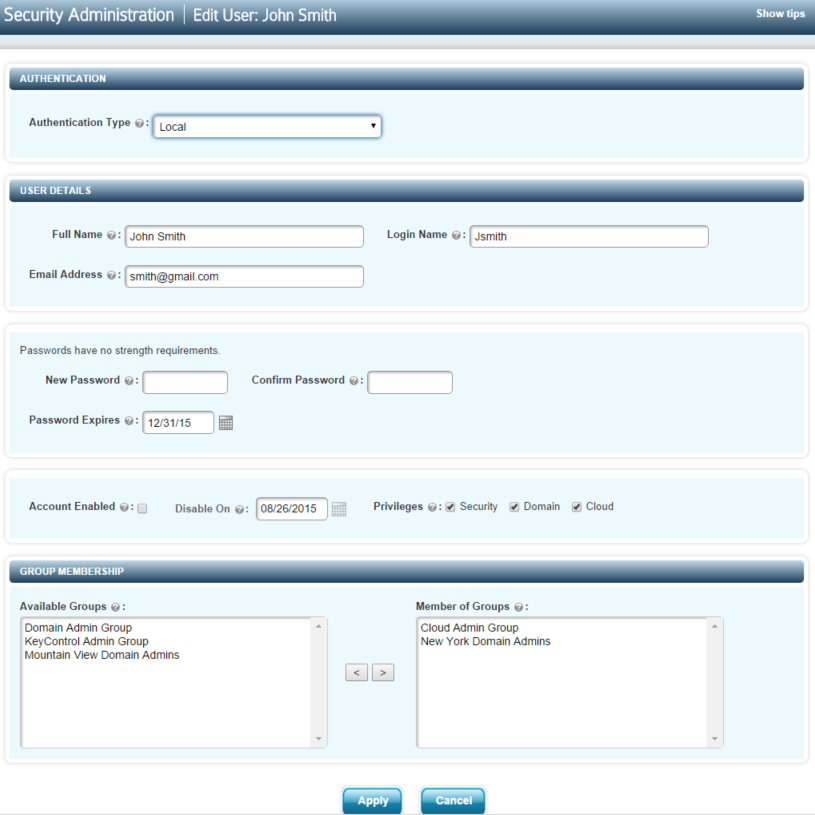
All fields shown can be modified. An account can be explicitly disabled by unchecking the Account Enabled field. Privileges can be added or removed. When removing a privilege, any groups specific to that privilege will be automatically removed. When adding either Domain or Cloud privileges a list of available groups will appear in the lower left pane for you to choose from. See the section Group Management, below, for further information.
Be careful when experimenting with privileges. If you accidentally revoke a privilege and then add it back, be sure to reinstate the groups to which the user previously belonged.
Group Management
Each object in HyTrust KeyControl is owned by a group. Examples of where and how groups are used are:
- Alerts are posted to groups.
- Logging / auditing information is visible on a group-by-group basis.
- Each KeyControl node is a member of the default KeyControl Admin Group.
- If VM Sets for different customers require separate administrators, create multiple groups and separate the admins into these groups. Each administrator will only get access to VM information that belongs to his or her group.
In a multi-tenant environment, you may have groups for each customer. If you don't want to have your administrators seeing different customers' policies, place them in separate groups.
The main places where group management is noticeable is with what a user can see (storage, VM Sets) and what audit records the user will be able to see. Security admins see all audit records. Other admins see only the audit records generated within their respective groups.
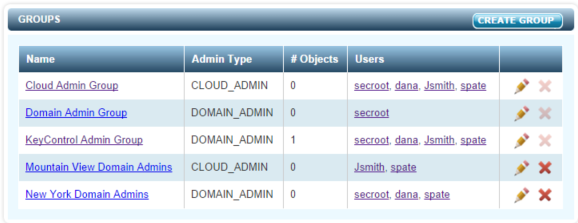
When the system is installed there are three default groups created, as shown below:
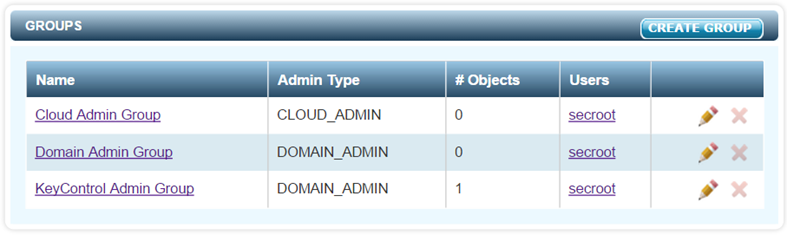
The groups can be changed and additional groups can be created.
- The Cloud Admin Group is a little different, because Cloud Admins are more individual. In this case, you may actually have many Cloud Admin groups and single members per group.
- The Domain Admin Group is used as the default group for all Domain Administration actions.
- The KeyControl Admin Group is used for all KeyControl cluster operations.
The names of these default groups can be changed easily. Just click on the pencil icon or click on the group name and select EDIT GROUP.
The system is fully functional with just these groups.
Creating New Groups
To create a new group, select the CREATE GROUP button from the Groups main screen (shown above). This brings up the group creation screen as shown below:
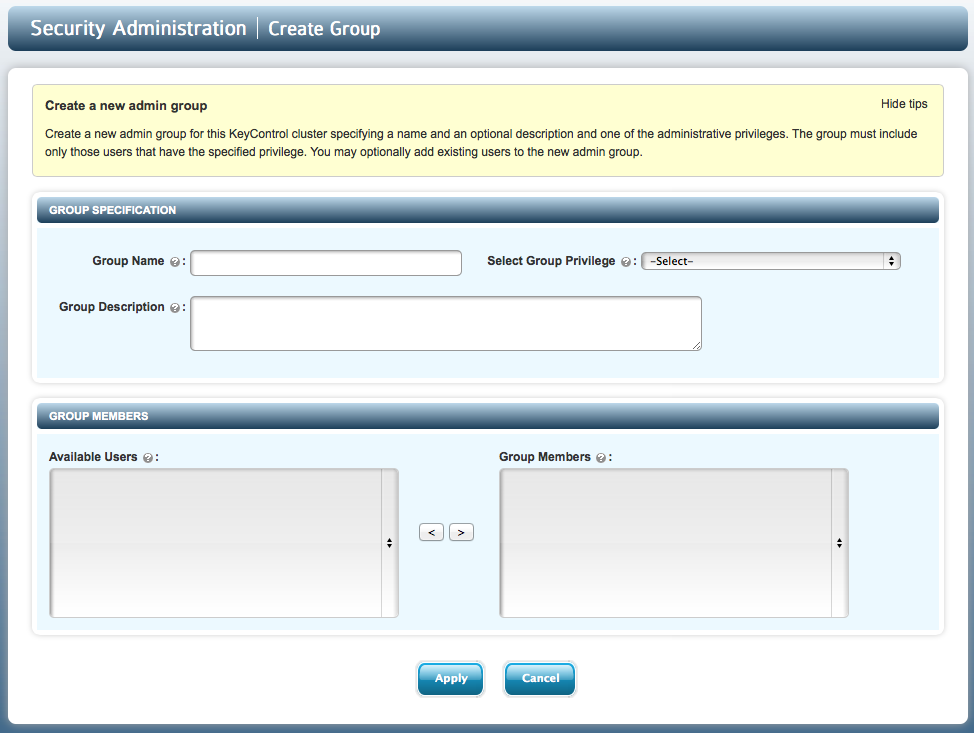
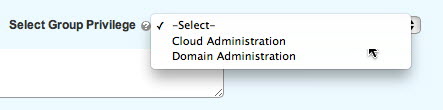
Select the name of the group and the type of group from the drop-down menu:
Based on the type of group selected, all administrators with the appropriate privilege will be displayed on the bottom left panel. Select the users that you wish to place in the group and then click Apply. The new group will then display alongside the other groups in the system:
Modifying Groups
By clicking the pencil icon for a group that you wish to modify, you will be presented with the Edit Group screen which is similar to the Create Group screen:
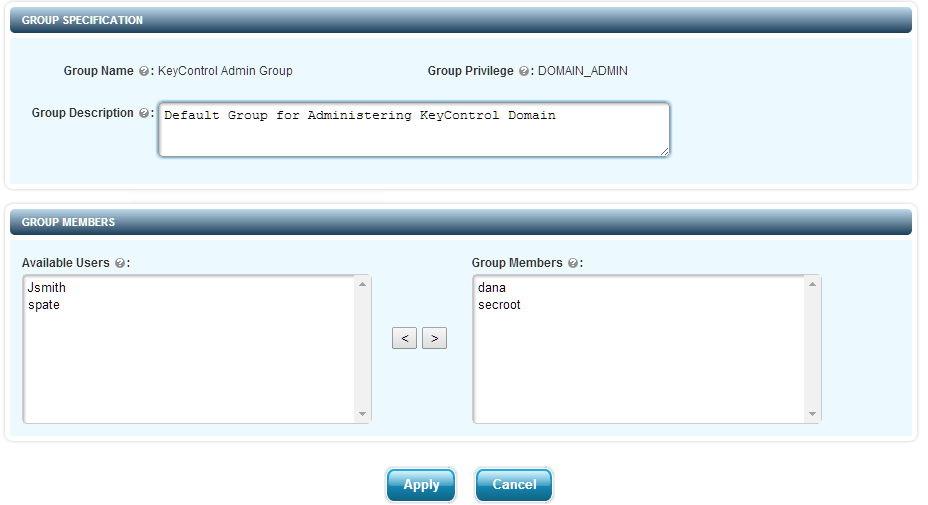
The name and description of the group can be changed. New users can be added to the group and existing users can be removed.
Changing Default User Settings
To change default user settings, from the SECURITY tab, select Users from the file tree and click the EDIT DEFAULT SETTINGS button. In the sections below, we describe the changes that can be made.
Authentication
HyTrust KeyControl supports authentication through a local password password database as well as authentication through the Remote Authentication Dial-In User Service (RADIUS).
Select the option you wish to choose from:

If you select Local you will see a set of password options:

If you select RADIUS you will see the following RADIUS settings:
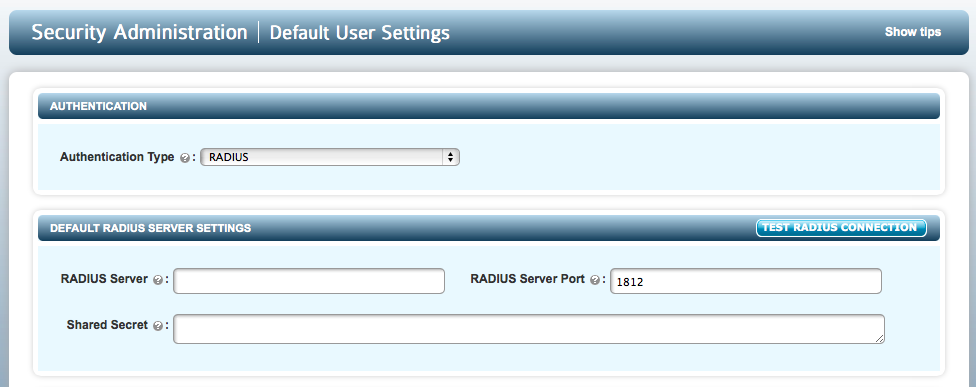
Setting up RADIUS Support
Select the SECURITY tab and click the EDIT DEFAULT SETTINGS button. Then choose RADIUS from the drop-down menu as shown above. You should then enter the configuration parameters required:
- RADIUS Server: Use either host name or IP address of the server.
- RADIUS Server Port: The port used in communications with the RADIUS server.
- Shared Secret: The shared secret set up for RADIUS communications.
You can test the RADIUS server connection with the TEST RADIUS CONNECTION button provided.
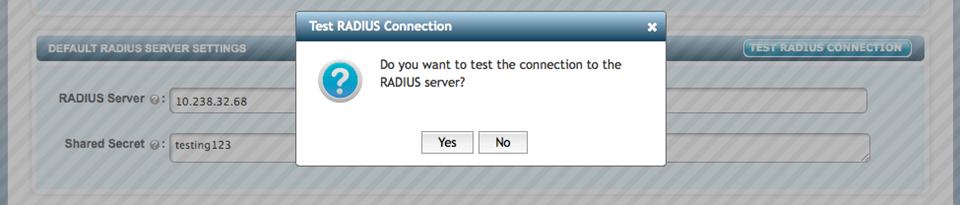
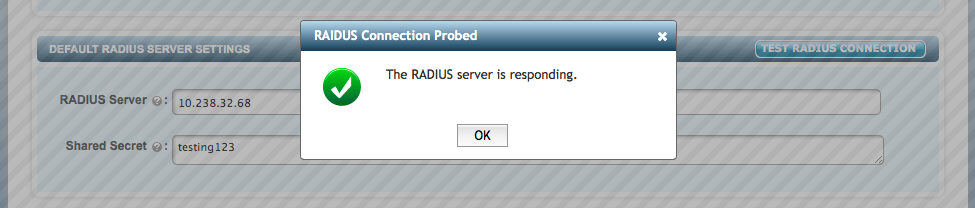
If the information is accurate, KeyControl checks the RADIUS connection and returns the following message:
If the settings are not accurate, KeyControl will return an error message. If you see the error message, check the settings, correct the information entered and test the server again.
If you see the The RADIUS server is responding message, click OK. and then click Apply.
After this, when you create a new user, RADIUS is selected as a default authentication type. For users that already exist, you will need to edit their individual settings for RADIUS authentication.
Default Password Settings
You can set password strength requirements on the EDIT DEFAULT SETTINGS page (accessed from the SECURITY tab).

The following fields can be customized to set the password strength:
Password Expires After: The password is valid for the number of days specified in this field. After the password expires, users are prompted to change their passwords.
Max. Number Failed Logins: The maximum number of logon attempts allowed. When the number of failed logon attempts exceeds the given number, the user account is disabled.
Min. Previous Passwords: The number of previous passwords to be stored in Hytrust KeyControl. The KeyControl compares these stored passwords with the new password every time a user changes the password. If the new password matches any of the previous passwords, it is rejected and the user is prompted to set a different password.
Min. Password Length: The minimum number of characters required.
Min. Upper Case Characters: Minimum number of uppercase characters required.
Min. Lower Case Characters: The minimum number of lowercase characters required.
Min. Required Digits: The minimum number of numeric characters required.
Min. Special Characters: The minimum number of special characters required.
At each user logon the given password is evaluated against the current policies for password strength. If the policies have changed and the password no longer meets the requirements, the user will be forced to change his or her password.
If a user fails to type the correct password within the allowable number of attempts, the account will be disabled. An alert and audit message will be generated and sent to each security administrator. One of the security administrators will then need to log on and enable the account.
The expiration number is in days. When the number of days is reached, the admin will be forced to change the password at the next logon. Disabled accounts are displayed in the webGUI as follows:

A user will not be able to detect that his or her account has been disabled, because usernames are never exposed. If the user is unable to log on to the system, a security administrator will need to log on to check the status of the account.
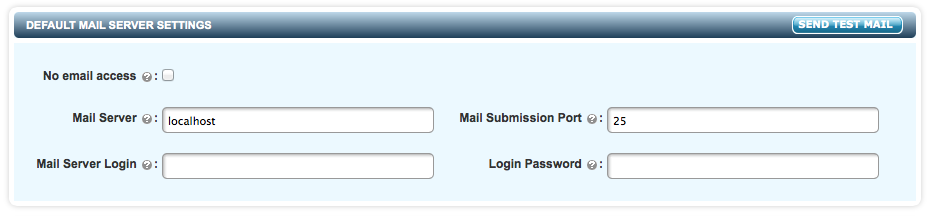
Default Email Settings
When secroot logs in for the first time, you (as secroot) need to provide email server settings to ensure that the master key parts can be enabled. These settings can be changed at any point in future. Note that if you check the No email access button, no email alerts or admin key parts can be sent out.
See the section An Overview of the webGUI for further information.
Default Admin Key Settings
The Admin Key is the highest level encryption key and is used to wrap (encrypt) other keys which in turn are used to protect various parts of the system. The Admin Key must not be compromised and should be carefully protected.
HyTrust KeyControl provides an "n of m" key sharing scheme whereby the Admin Key can be split into "m" pieces. These "m" pieces are mailed to "m" security administrators. To reinstate the Admin Key, "n" of the security administrators need to be present to enter their portion of the key. The number of parts ("n") is determined by you and key parts will be mailed to the security administrators ("m").

For more detailed information about Admin Key management, see the section KeyControl Backup and Restore
License Management
Information about the license installed can be accessed by clicking the License link from the top right of any screen.

After clicking on the link, you will be taken to the main license page, as shown below:
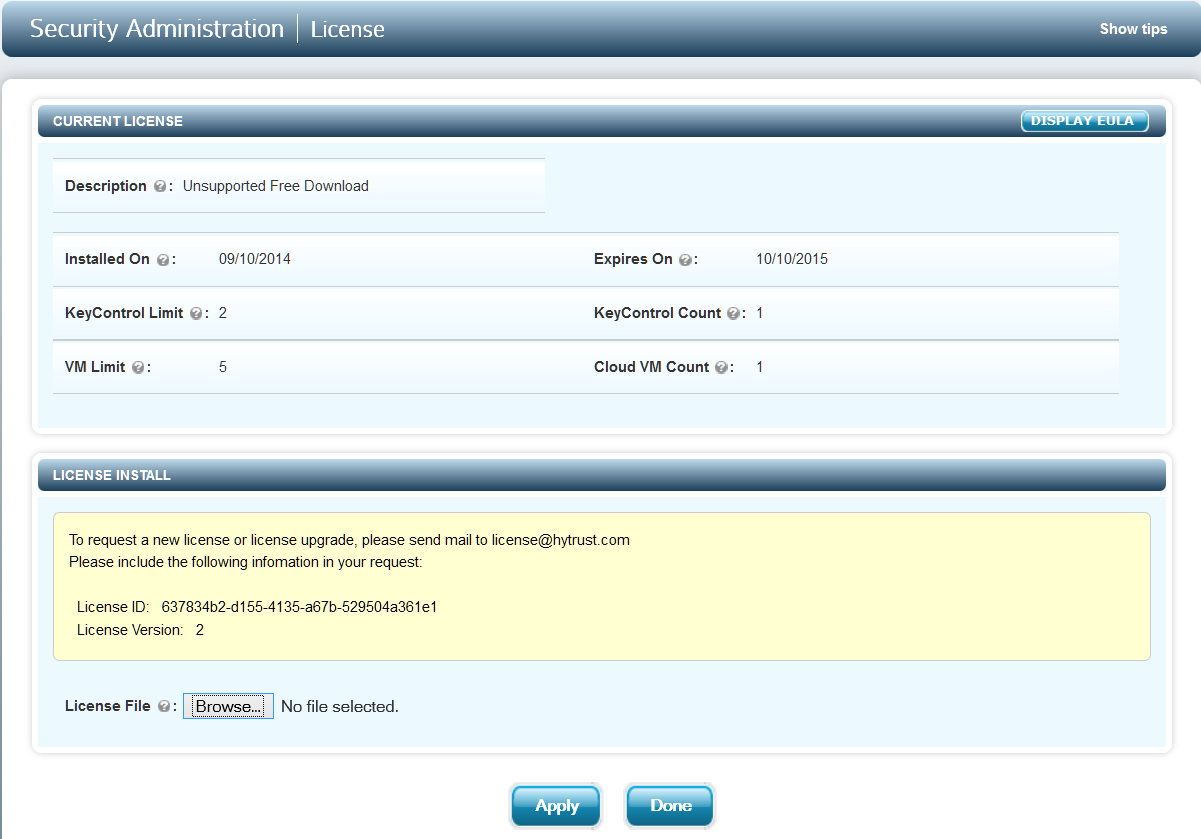
Information about the license is displayed along with the License ID which is needed to generate a new license. Issued license files can be uploaded on this screen.
Installing a new license
After installing the first KeyControl node and logging in for the first time, you will see that you have a free 30-day license. To use the product beyond 30 days you need to contact HyTrust sales to obtain a commercial license. To get a license, the License ID needs to be given to HyTrust sales.
To locate the issued license file, click the Choose File button and navigate through the file browser to locate the appropriate license file. The license key must be accessible from the machine on which you are running the browser.
After the file is uploaded, click Apply and, assuming that the license key is valid, you will be informed that the License install was successful and you will see details about your installation.
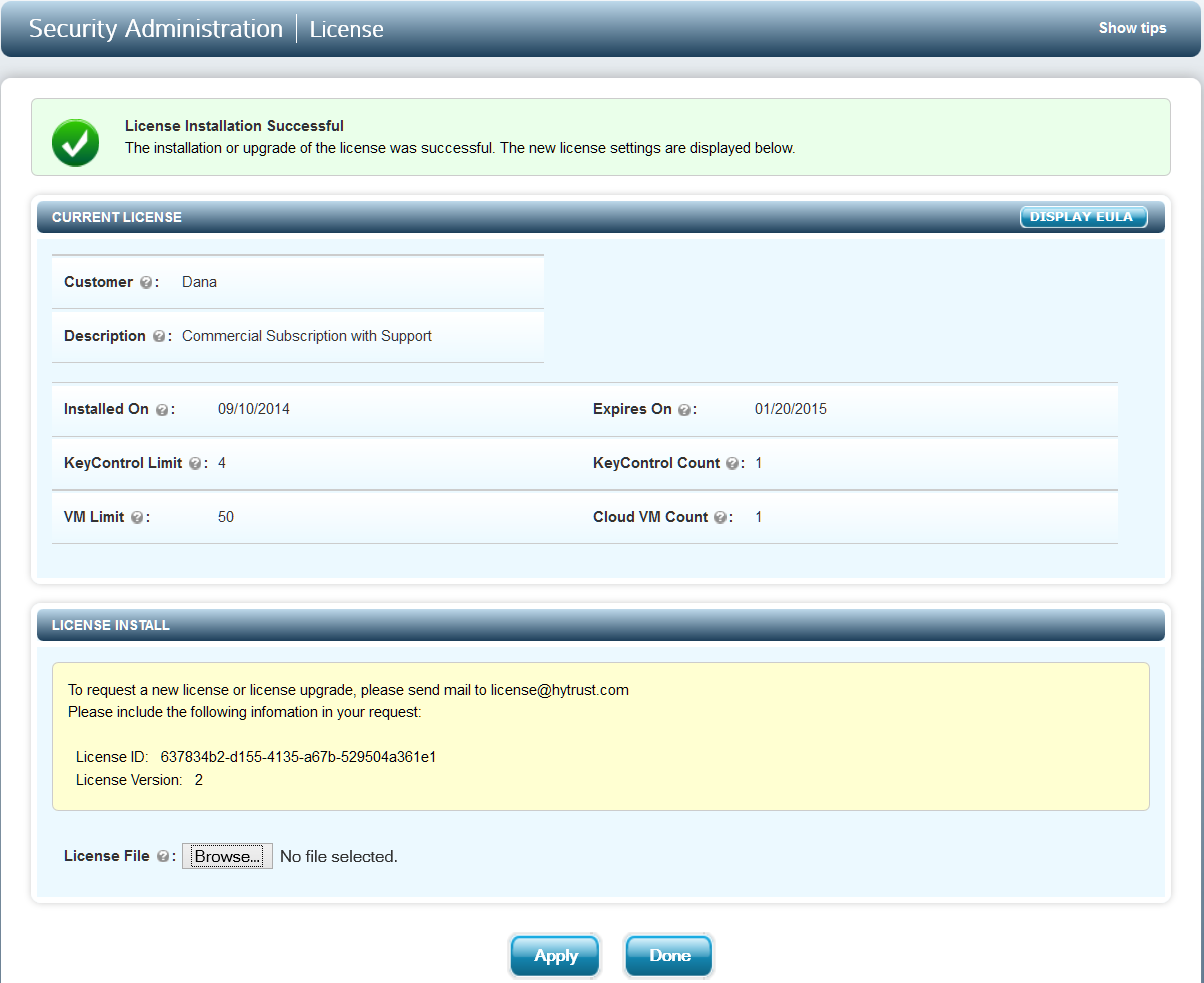
Once the new license is applied, select DONE and you will be taken to the main screen for security administration.