Open topic with navigation
Deploying a KeyControl Cluster in Azure Resource Manager (ARM)
Prior to deploying a KeyControl cluster you should set up the Azure resources required for this deployment. In this example, we have deployed a 2-node KeyControl cluster using two different Virtual Networks (VNets).
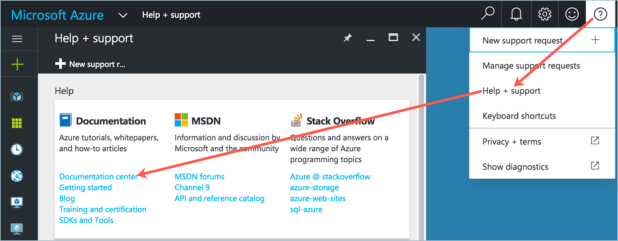
Note that we frequently refer to the Azure documentation. To get the Azure documentation, launch Microsoft Azure and click the question mark in a circle on the top bar, then Help + support, and then Documentation center:
We are using the "new portal" for Azure, so if your account comes up with a different look, click "Check out the new portal at the top of the screen, and then Launch." You should then see your Dashboard. You begin most commands by clicking + New, at the top left of the screen:
1. Create a Resource Group
Refer to Azure documentation for creating a resource group.
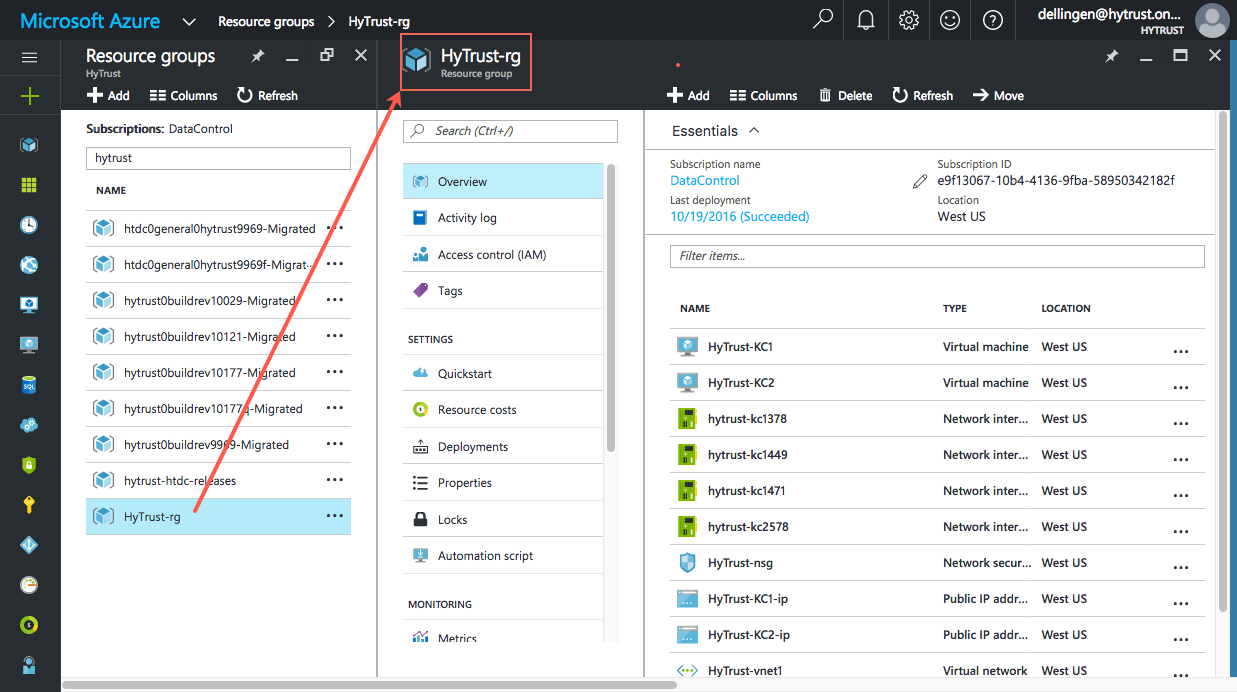
In this example, we created HyTrust-rg in the West US region. Create a Resource group that meets your needs. This resource group is created to contain all the resources required for this deployment. Here is a view of the HyTrust-rg, showing the majority of the resources we describe in this document::
2. Create a Virtual Network
Refer to Azure documentation for creating virtual networks. In this example, we created HyTrust-vnet1 in the West US region with a network address space of 10.21.0.0/16 and a single default subnet of 10.21.0.0/24. HyTrust-vnet1 is in the HyTrust-rg resource group.
3. Create Another Virtual Network
Refer to Azure documentation for creating virtual networks. If a second KeyControl is deployed in the same VNet as the first one, there is no need to create a second VNet and no further network infrastructure is needed.
In this example, we created HyTrust-vnet2 in the West US region with a network address space of 15.5.0.0/16 and a single default subnet of 15.5.0.0/24. HyTrust-vnet2 is in HyTrust-rg resource group.
Note that there should be no overlapping IP addresses between the two VNet address spaces.
If the two VNets are in the same region, network peering must be established between the two VNets in both directions. For establishing network peering, refer to the Azure documentation for network peering.
If the two VNets belong to two different regions, Site-to-Site connection must be set up for both VNets to allow them to access each other through private IP addresses. For VPN deployment for Site-to-Site connection, refer to the Azure documentation.
4. Create a Network Security Group
Refer to Azure documentation for Network security groups. In this example, we created HyTrust-nsg in the HyTrust-rg resource group in the West US region, with the following inbound security rules:
https-rule     HTTPS (TCP/443)	       Allow   Any
ssh-rule 	SSH (TCP/22)		Allow	Any
support 	Custom (TCP/6666	Allow	Any
auth-comm1 	Custom (TCP/2525)	Allow	Any
auth-comm2	Custom (TCP/2526)	Allow	Any
kc-comm	Custom (TCP/8443)	Allow	Any
IMPORTANT SECURITY NOTE: Although in this example, the above ports are wide open to all inbound network traffic, the source IP address range in these rules should limit inbound network traffic according to your organization's security policy. At a minimum, inbound rules should allow network traffic from one KeyControl to the other KeyControls, or the address space (CIDR) of the subnets the KeyControls reside in.
5. Create a Storage Account
Refer to Azure documentation for creating storage accounts. In this example, we created a general purpose premium resource manager storage account named "hytrustsa" as part of HyTrust-rg resource group in the West US location.
6. Generate an SSH Key Pair
To access a KeyControl in Azure ARM, an ssh-rsa key pair is required. Refer to Azure documentation for generating SSH keys in Unix and Windows platforms. In most UNIX systems a key can be generated by executing "ssh-keygen -t rsa -b 2048", or "openssl genrsa" combined with "openssl rsa" to create private and public keys. In this example, a key is generated, the private key is saved in priv_key and the public key is stored in pub_key. pub_key will be needed to deploy KeyControl into Azure ARM and priv_key is used to access the KeyControl System Menus. In this example, we use a single key pair for both KeyControl deployments.
7. Deploy the Initial KeyControl
- Login to Azure Resource Manager.
- Click + New at the top left of the page.
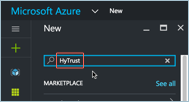
- Enter "
HyTrust" in the Search the marketplace dialog box.
- Select
HyTrust DataControl for Azure BYOL from the table of images.
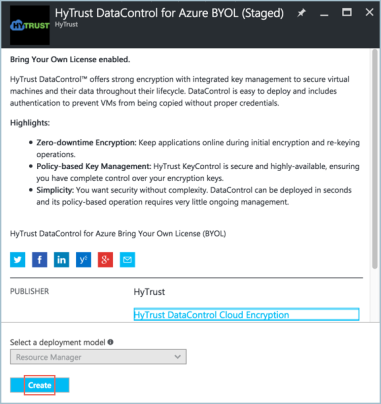
- Click Create to create a VM in Resource Manager.
- In the Basic configuration section, enter the name of the KeyControl VM, in this example, we used
HyTrust-KC1.
- It is recommended to select SSD as your VM disk type.
- Enter "
sysmenus" as User name.
- Copy and paste the KeyControl public key, stored previously in the
pub_key file, in the SSH public key dialog box.
- In the Resource group dialog box select Use existing, and from the drop-down menu select the resource group for the VM. In this example, we selected HyTrust-rg.
- Finally, in the Location dialog box, select the deployment region, in this example, West US.
- Click OK.
- Select the size of the virtual machine. DS2 Standard is recommended, but you can click View all to see other choices. Choose one, and then click Select.
- In the Settings section, you can change various optional features. This is where you can select the storage account for this KeyControl. In this example, we selected hytrustsa.
- Select the VNet KeyControl in which you will deploy HyTrust-KC1. In this example, we chose HyTrust-vnet1.
- Select Public IP Address, and then select Static as IP address type.
- Click OK.
- Select the network security group for the KeyControl server, in this example, we selected HyTrust-nsg.
- Accept the defaults for the other fields.
- In the deployment summary section, click OK.
- Click Purchase in the Buy section.
- Allow deployment to complete. When the status of your new KeyControl is displayed as Running in the Virtual Machines table, the deployment is done.
7a. Convert Private IP Address to Static
- In the Left pane, click Virtual Machines.
- Click the name of your new KeyControl server in the VM table, in this example, we selected HyTrust-KC1.
- Click on Network interfaces of your VM.
- In the Network interfaces table, click VM interface. There should be only one network interface allocated to the KeyControl.
- Click IP Configuration.
- Click the ipconfig1 row in the table.
- Select Static in the Private IP address settings section.
- Do not change the private IP address assigned to your KeyControl.
- Click Save to save the new network interface configuration.
7b. Connect to KeyControl System Menus
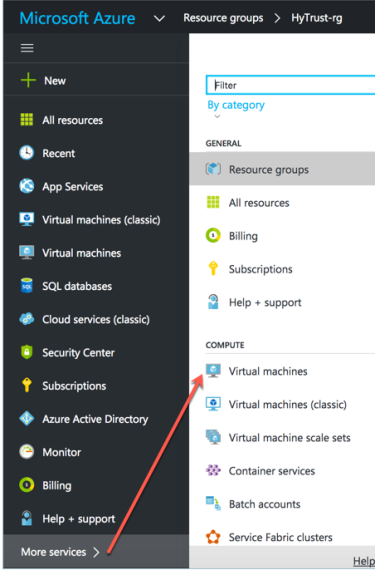
- At the bottom of the left pane of the Main page, select More services. Under Compute, select Virtual machines.
In the VM table select the row belonging to the KeyControl that was just deployed. In this example, HyTrust-KC1.
- Record the public IP address of the newly created VM.
- In a terminal session, enter:
# ssh -i <priv_key> sysmenus@<pub_ip>
...where <priv_key> is the name of the file containing the private key previously generated for accessing KeyControl System Menus, and <pub_ip> is the public IP address of the new KeyControl server.sys
- When prompted, enter "sysmenus" as the password.
- You will connect to the KeyControl server and be prompted for a new password.
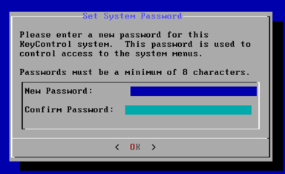
- In the Set System Password dialog box, enter a password for future System Menus access. Re-enter the same password for confirmation.
- Click OK.
- Select NO in the next screen to create this node as an initial KeyControl.
- Configuration is complete. Select OK to go to the main menu, and log out of sysmenus.
8. Add a second KeyControl to form a cluster.
- Click New (+) at the top right of the page.
- Enter
HyTrust in the Search the marketplace dialog box.
- Select HyTrust DataControl for Azure BYOL from the table of HyTrust Images.
- Click Create to create a VM in the Resource Manager.
- In the Basic settings configuration section, enter the name of your KeyControl, in this example, HyTrust-KC2.
- It is recommended to select SSD as VM disk type.
- Enter "sysmenus" as the User name.
- Copy and paste your KeyControl public key, stored previously in the
pub_key file in the SSH public key box.
- In the Resource group box, select Use existing and from the drop-down menu select the resource group for the VM. In this example HyTrust-rg is selected.
- Finally, in the Location box select the deployment region, in this example, West US.
- Click OK.
- Select the size of the virtual machine. DS2 Standard is recommended, but you can click View all to see other choices. Then click Select.
- In the Optional features section, select the storage account for this KeyControl. In this example, we used hytrustsa.
- Select the VNet where you will deploy KeyControl HyTrust-KC2. In this example, HyTrust-vnet2.
- Select Public IP Address. Select Static as IP address type.
- Click OK.
- Select the network security group for KeyControl server, in this example, HyTrust-nsg.
- Accept the defaults for other fields.
- In the Deployment summary section, click OK.
- Click Purchase in the Buy section.
- Allow deployment to complete. When the status of your new KeyControl is displayed as Running in the Virtual machine table, the deployment is done.
8a. Convert Private IP Address to Static
- In the Left pane, click Virtual Machines.
- Click the name of your new KeyControl server in the VM table, in this example HyTrust-KC2.
- Click on Network interfaces of your VM.
- In the Network interfaces table, click VM interface. There should be only one network interface allocated to the KeyControl.
- Click IP Configuration.
- Click the ipconfig1 row in the table.
- Select Static in the Private IP address settings section.
- Do not change the private IP address assigned to your KeyControl.
- Click Save at the top to save the new network interface configuration.
8b. Connect to KeyControl System Menus.
- In the left pane of the Main page, select More services. Under Compute, select Virtual machines. In the VM table select the row belonging to the KeyControl that was just deployed. In this example, HyTrust-KC2.
- Record the public IP address of the newly created VM.
- In a terminal enter:
# ssh -i <priv_key> sysmenus@<pub_ip>
...where <priv_key> is the name of the file containing the private key previously generated for accessing KeyControl System Menus, and <pub_ip> is the public IP address of the new KeyControl server.
- Enter "sysmenus" as the Password.
- In the Set System Password, enter a password for future System Menus access. Re-enter the same password for confirmation.
- Click OK.
- Select Yes in the next screen to add this node to an existing cluster. In this example to HyTrust-KC1.
- Optionally, you can enter a description for your new KeyControl. Click OK.
- Enter the private IP address of the first KeyControl, in this example the private IP address of the HyTrust-KC1. You can look up the private IP address of VMs in the portal by navigating to Network interfaces of the VM.
- Enter a one-time passphrase for node authentication.
- Next, you login to the GUI of the first KeyControl for authentication. When authentication is successfully complected, you can click OK and log out of the System Menus.
8c. Connect to GUI of first KeyControl and authenticate the new KeyControl
- Point your browser to
https://pubip/ where pubip is the public IP address of an existing KeyControl server. In this example, it is the public IP address of HyTrust-KC1. The HyTrust login window appears:
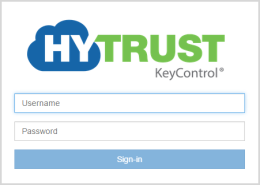
- Login as "secroot" with the initial password of "secroot".
- Agree to the terms of the licensing agreement (EULA).
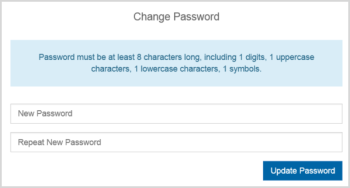
- In the Change password window, enter a new password for secroot. Re-enter the same password to confirm. Remember this password for future access to the GUI as security administrator.
- Update secroot email information.
- Navigate to the Cluster tab at the top of the page.
- In the Cluster page click the Servers tab.
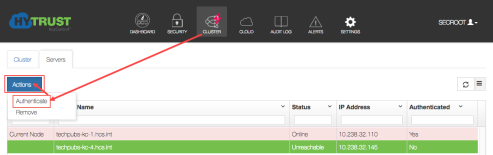
- The new node, HyTrust-KC2, appears in the table of servers as Unreachable. Select that row.
- From the Action drop down menu above the servers table, select Authenticate.
- Enter the passphrase that was created during the new KeyControl installation of HyTrust-KC2.
- Once the new KeyControl server successfully joins the cluster, you should see its status as Online and the state of cluster status as Healthy (green heart on the Cluster icon) after you refresh the page.
Open topic with navigation